- 在 NOTE/DOC 的工具栏注册一个按钮
- 在 NOTE/DOC 的套索工具栏注册一个按钮
- 在 DOC 的划词工具栏注册一个按钮
插件项目创建
插件项目本质上是一个 React Native 项目。建议使用社区 CLI 的npx 方式创建工程(通常不需要全局安装 react-native-cli)。
如果你曾经全局安装过旧版 react-native-cli(或全局 react-native),建议先卸载,避免脚手架版本冲突:
npx ... init 命令创建项目即可。
创建项目使用以下命令:
project_name 是项目名称,可替换为你自己的名称,其余参数保持不变。下面以 plugin 为例:
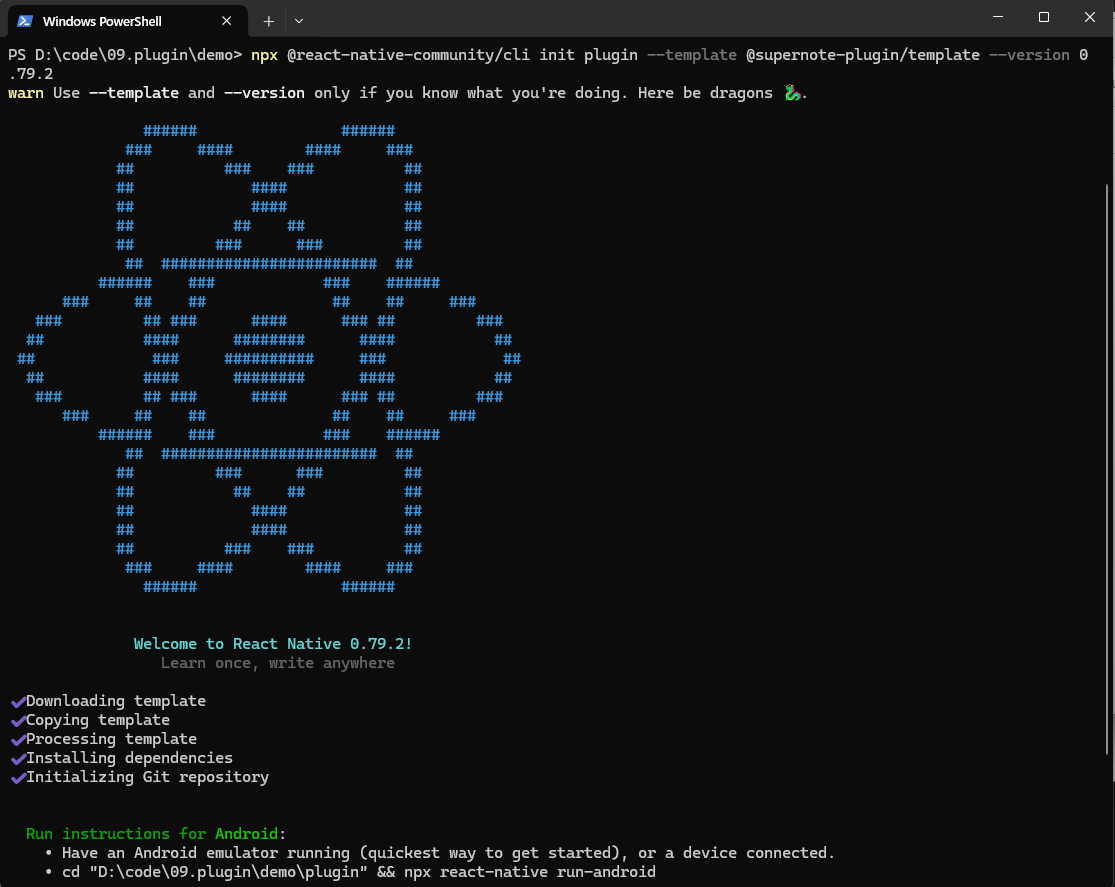
插件框架使用的 React Native 版本是
0.79.2。创建插件项目时必须使用同版本,否则插件可能无法运行或无法与宿主兼容。index.js:插件入口(初始化与按钮注册)App.tsx:插件界面入口(React 组件)package.json:依赖与脚本配置android/:Android 原生代码目录(需要原生能力时使用)buildPlugin.ps1/buildPlugin.sh:插件打包脚本
sn-plugin-lib)。后续在代码中通过 import ... from 'sn-plugin-lib' 使用接口。
插件初始化
创建项目后会生成两个关键文件:index.js 与 App.tsx。它们来自模板 @supernote-plugin/sn-plugin-template。
index.js 是 React Native 程序入口,也是插件入口。插件启动时会先执行该文件,因此插件初始化也在这里完成。
你必须先调用 PluginManager.init(),否则后续的插件接口调用会无效。示例代码如下:
PluginManager,再在 AppRegistry.registerComponent(...) 之后调用 PluginManager.init() 完成初始化。
其余部分是 React Native 工程模板生成的:AppRegistry.registerComponent(...) 用于注册界面入口,对应组件为 App.tsx。
按钮注册
插件支持三类入口按钮:- 工具栏按钮:显示在 NOTE/DOC 的工具栏中
- 套索工具栏按钮:用户套索选中元素后显示在套索工具栏中
- 划词工具栏按钮:DOC 特有。用户在文档中选中一段文字后显示在划词工具栏中
工具栏按钮注册
工具栏按钮需要在index.js 中注册,并且必须在 AppRegistry.registerComponent(...) 与 PluginManager.init() 之后调用:
PluginManager.registerButton(type, appTypes, buttonConfig) 完成,包含三个参数:
-
type:按钮类型。1工具栏按钮,2套索工具栏按钮,3划词工具栏按钮(DOC 特有) -
appTypes:按钮支持的应用类型数组。可选值:NOTE、DOC -
buttonConfig:按钮属性对象:
showType=1 时,点击按钮后 PluginHost 会打开一个全屏容器,渲染插件界面。
当 showType=0 时,不展示界面,但插件仍会收到按钮事件,你可以在后台执行业务逻辑。
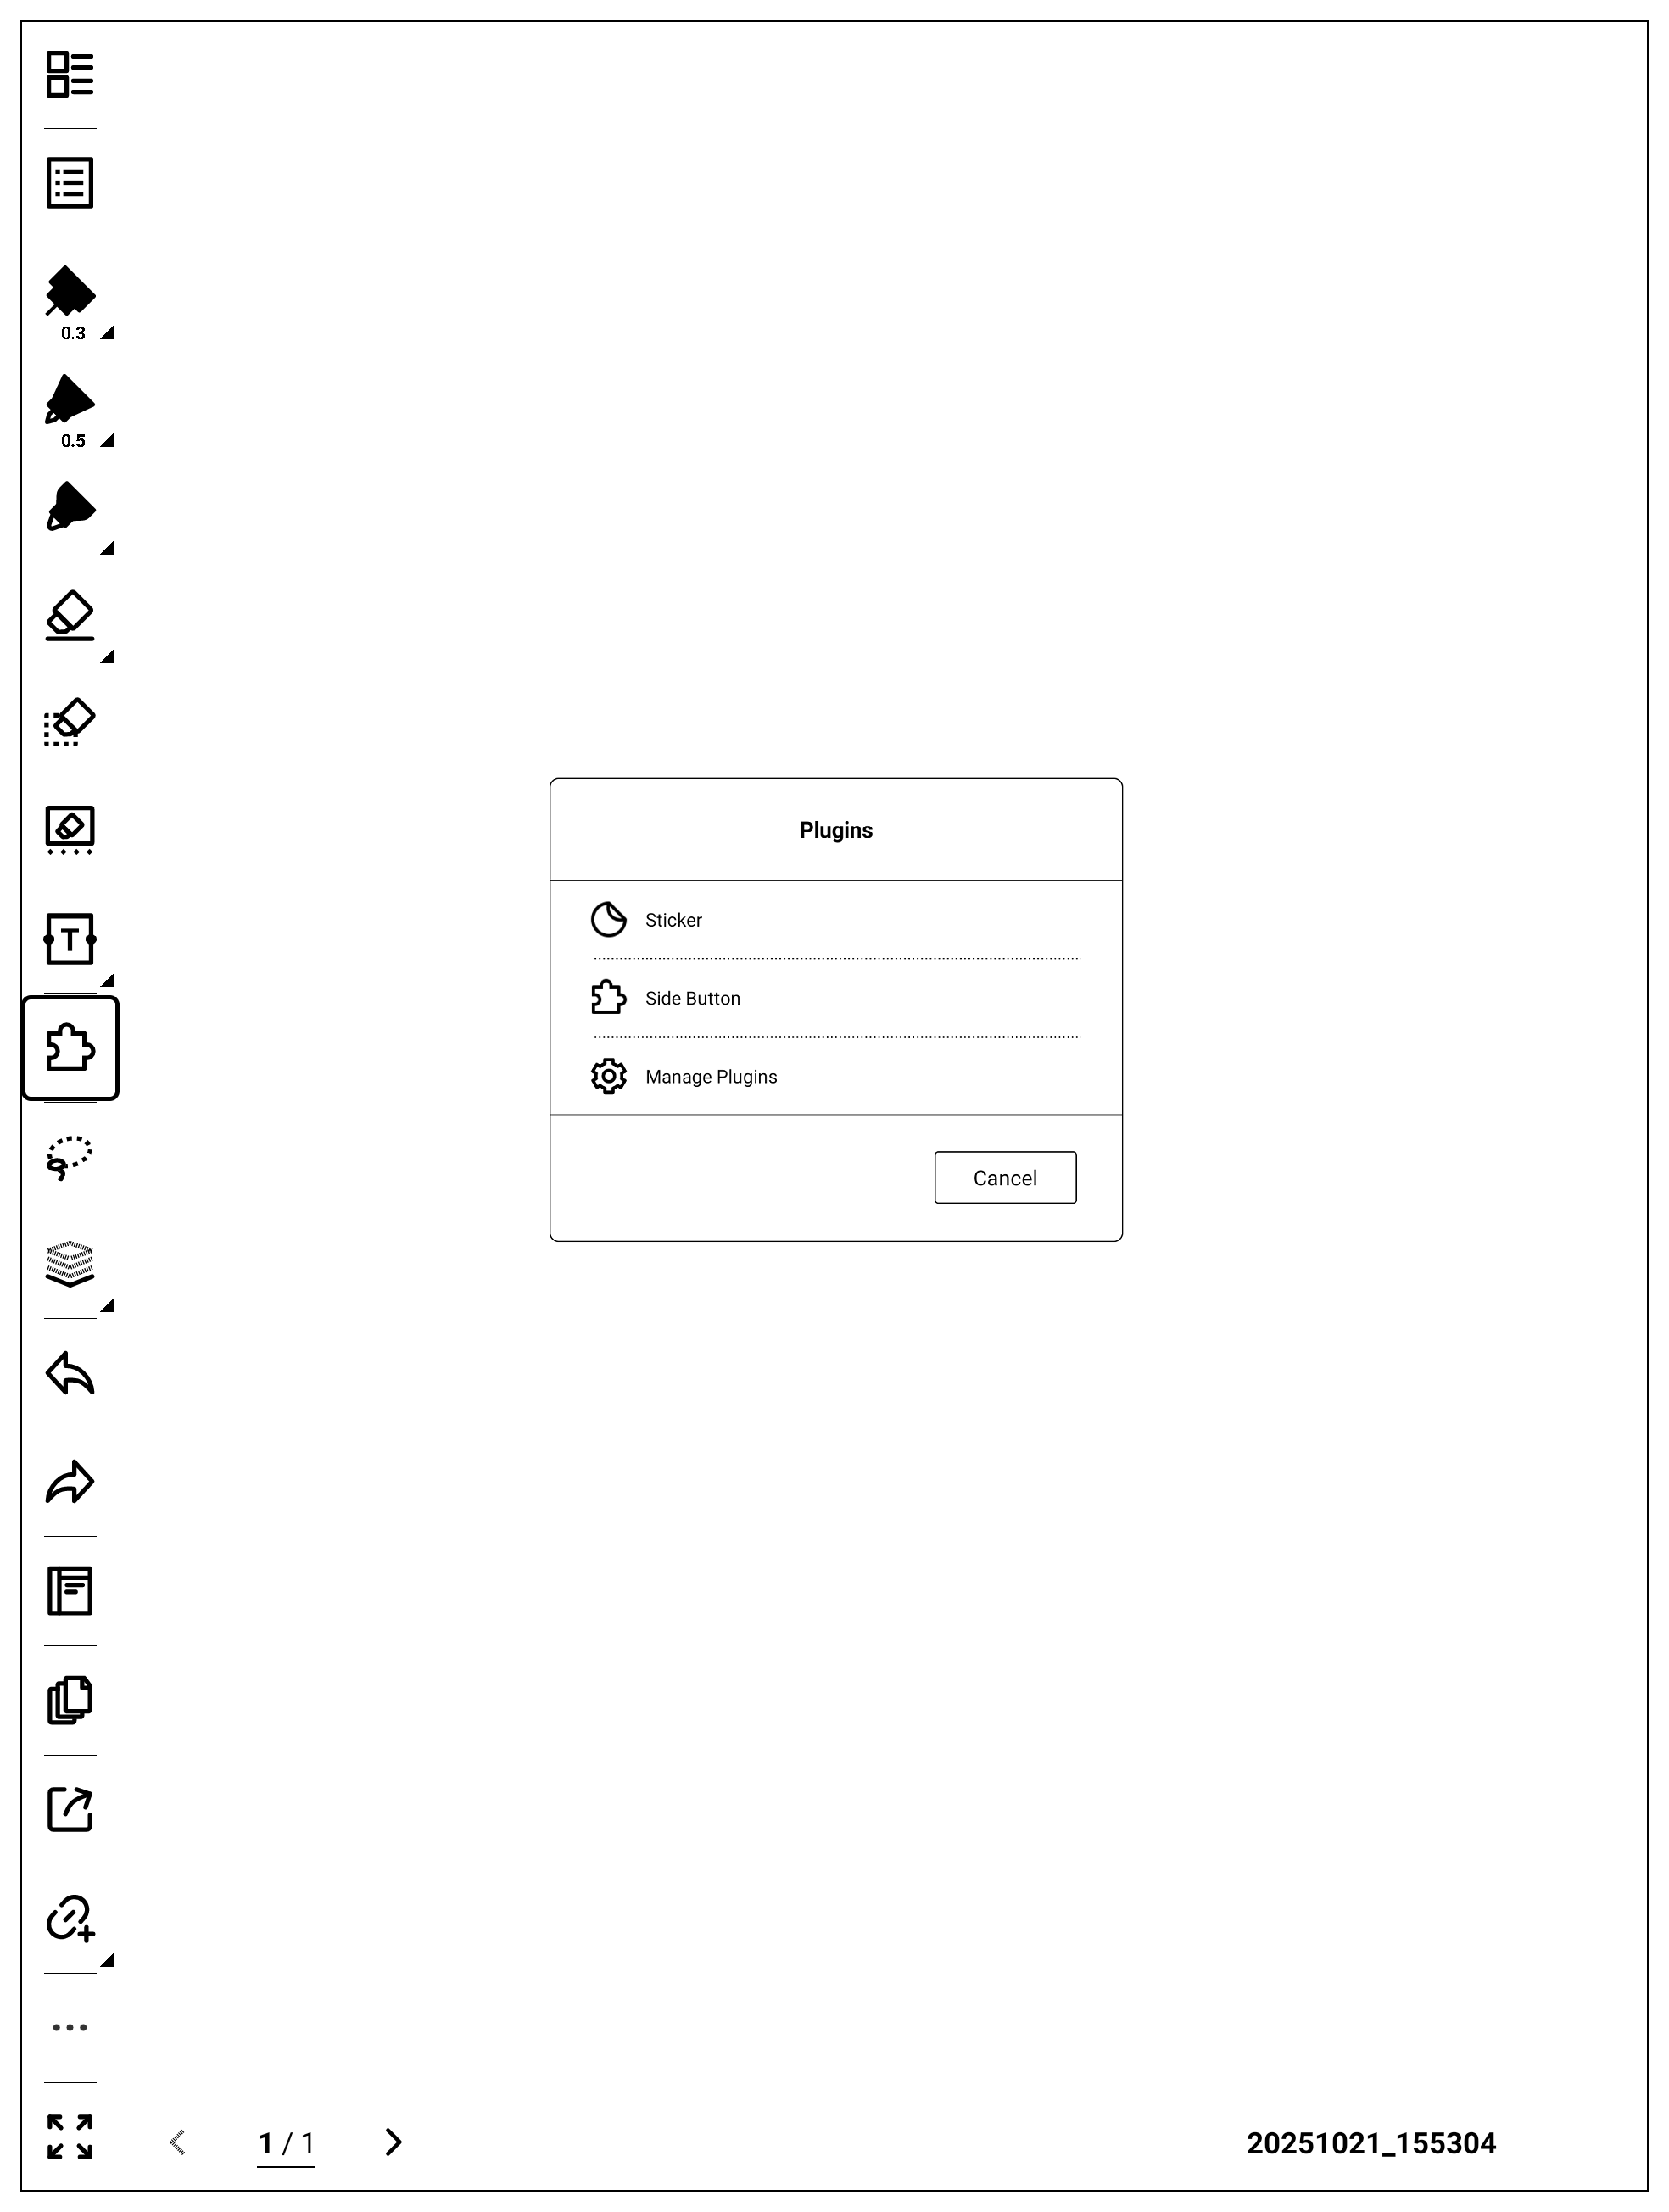
打包安装后,NOTE/DOC 的工具栏会出现一个插件入口按钮,如下图所示:
套索工具栏按钮注册
套索工具栏按钮同样使用PluginManager.registerButton 注册:
type=2,按钮就会显示在套索工具栏中。
第三个参数和工具栏按钮注册不太一样,数据说明如下:
editDataTypes。它是数组,用于指定“哪些套索数据类型出现时才展示该按钮”。
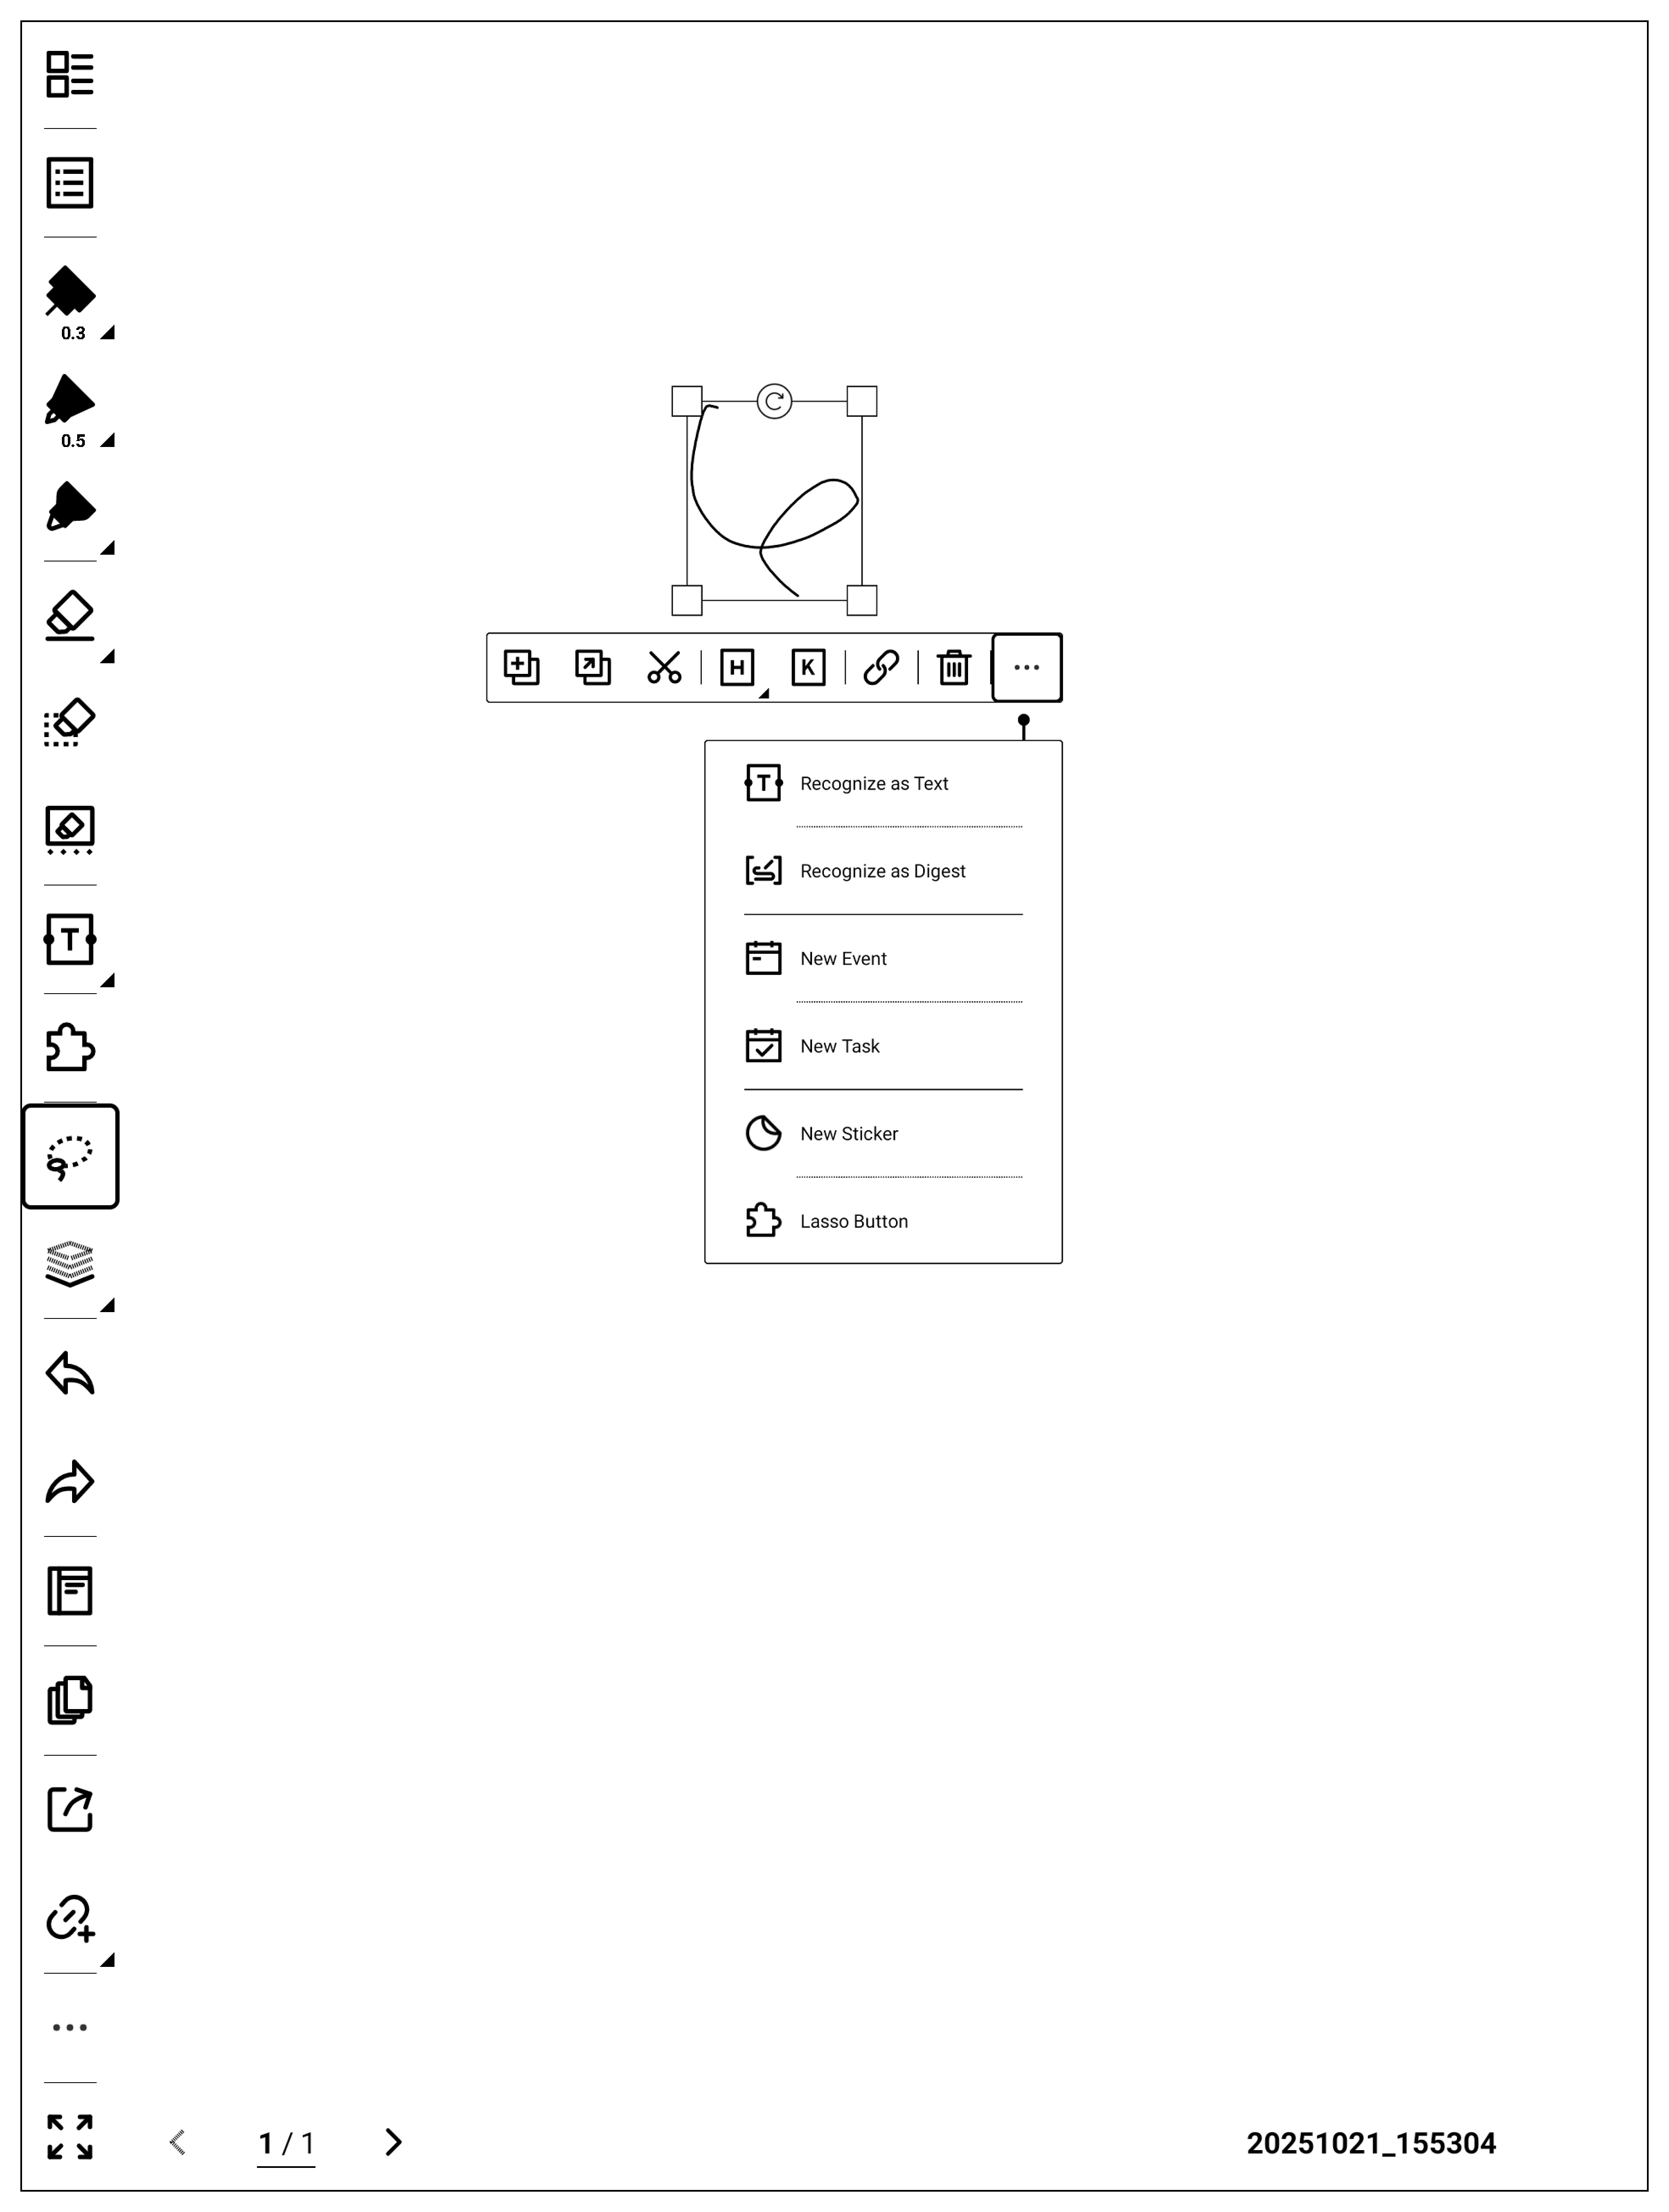
根据上面的代码,设置完之后,插件打包安装,套索笔划就会出现“Lasso Button”的按钮,如下图:
划词按钮注册
划词按钮是 DOC 特有按钮,同样通过PluginManager.registerButton 注册:
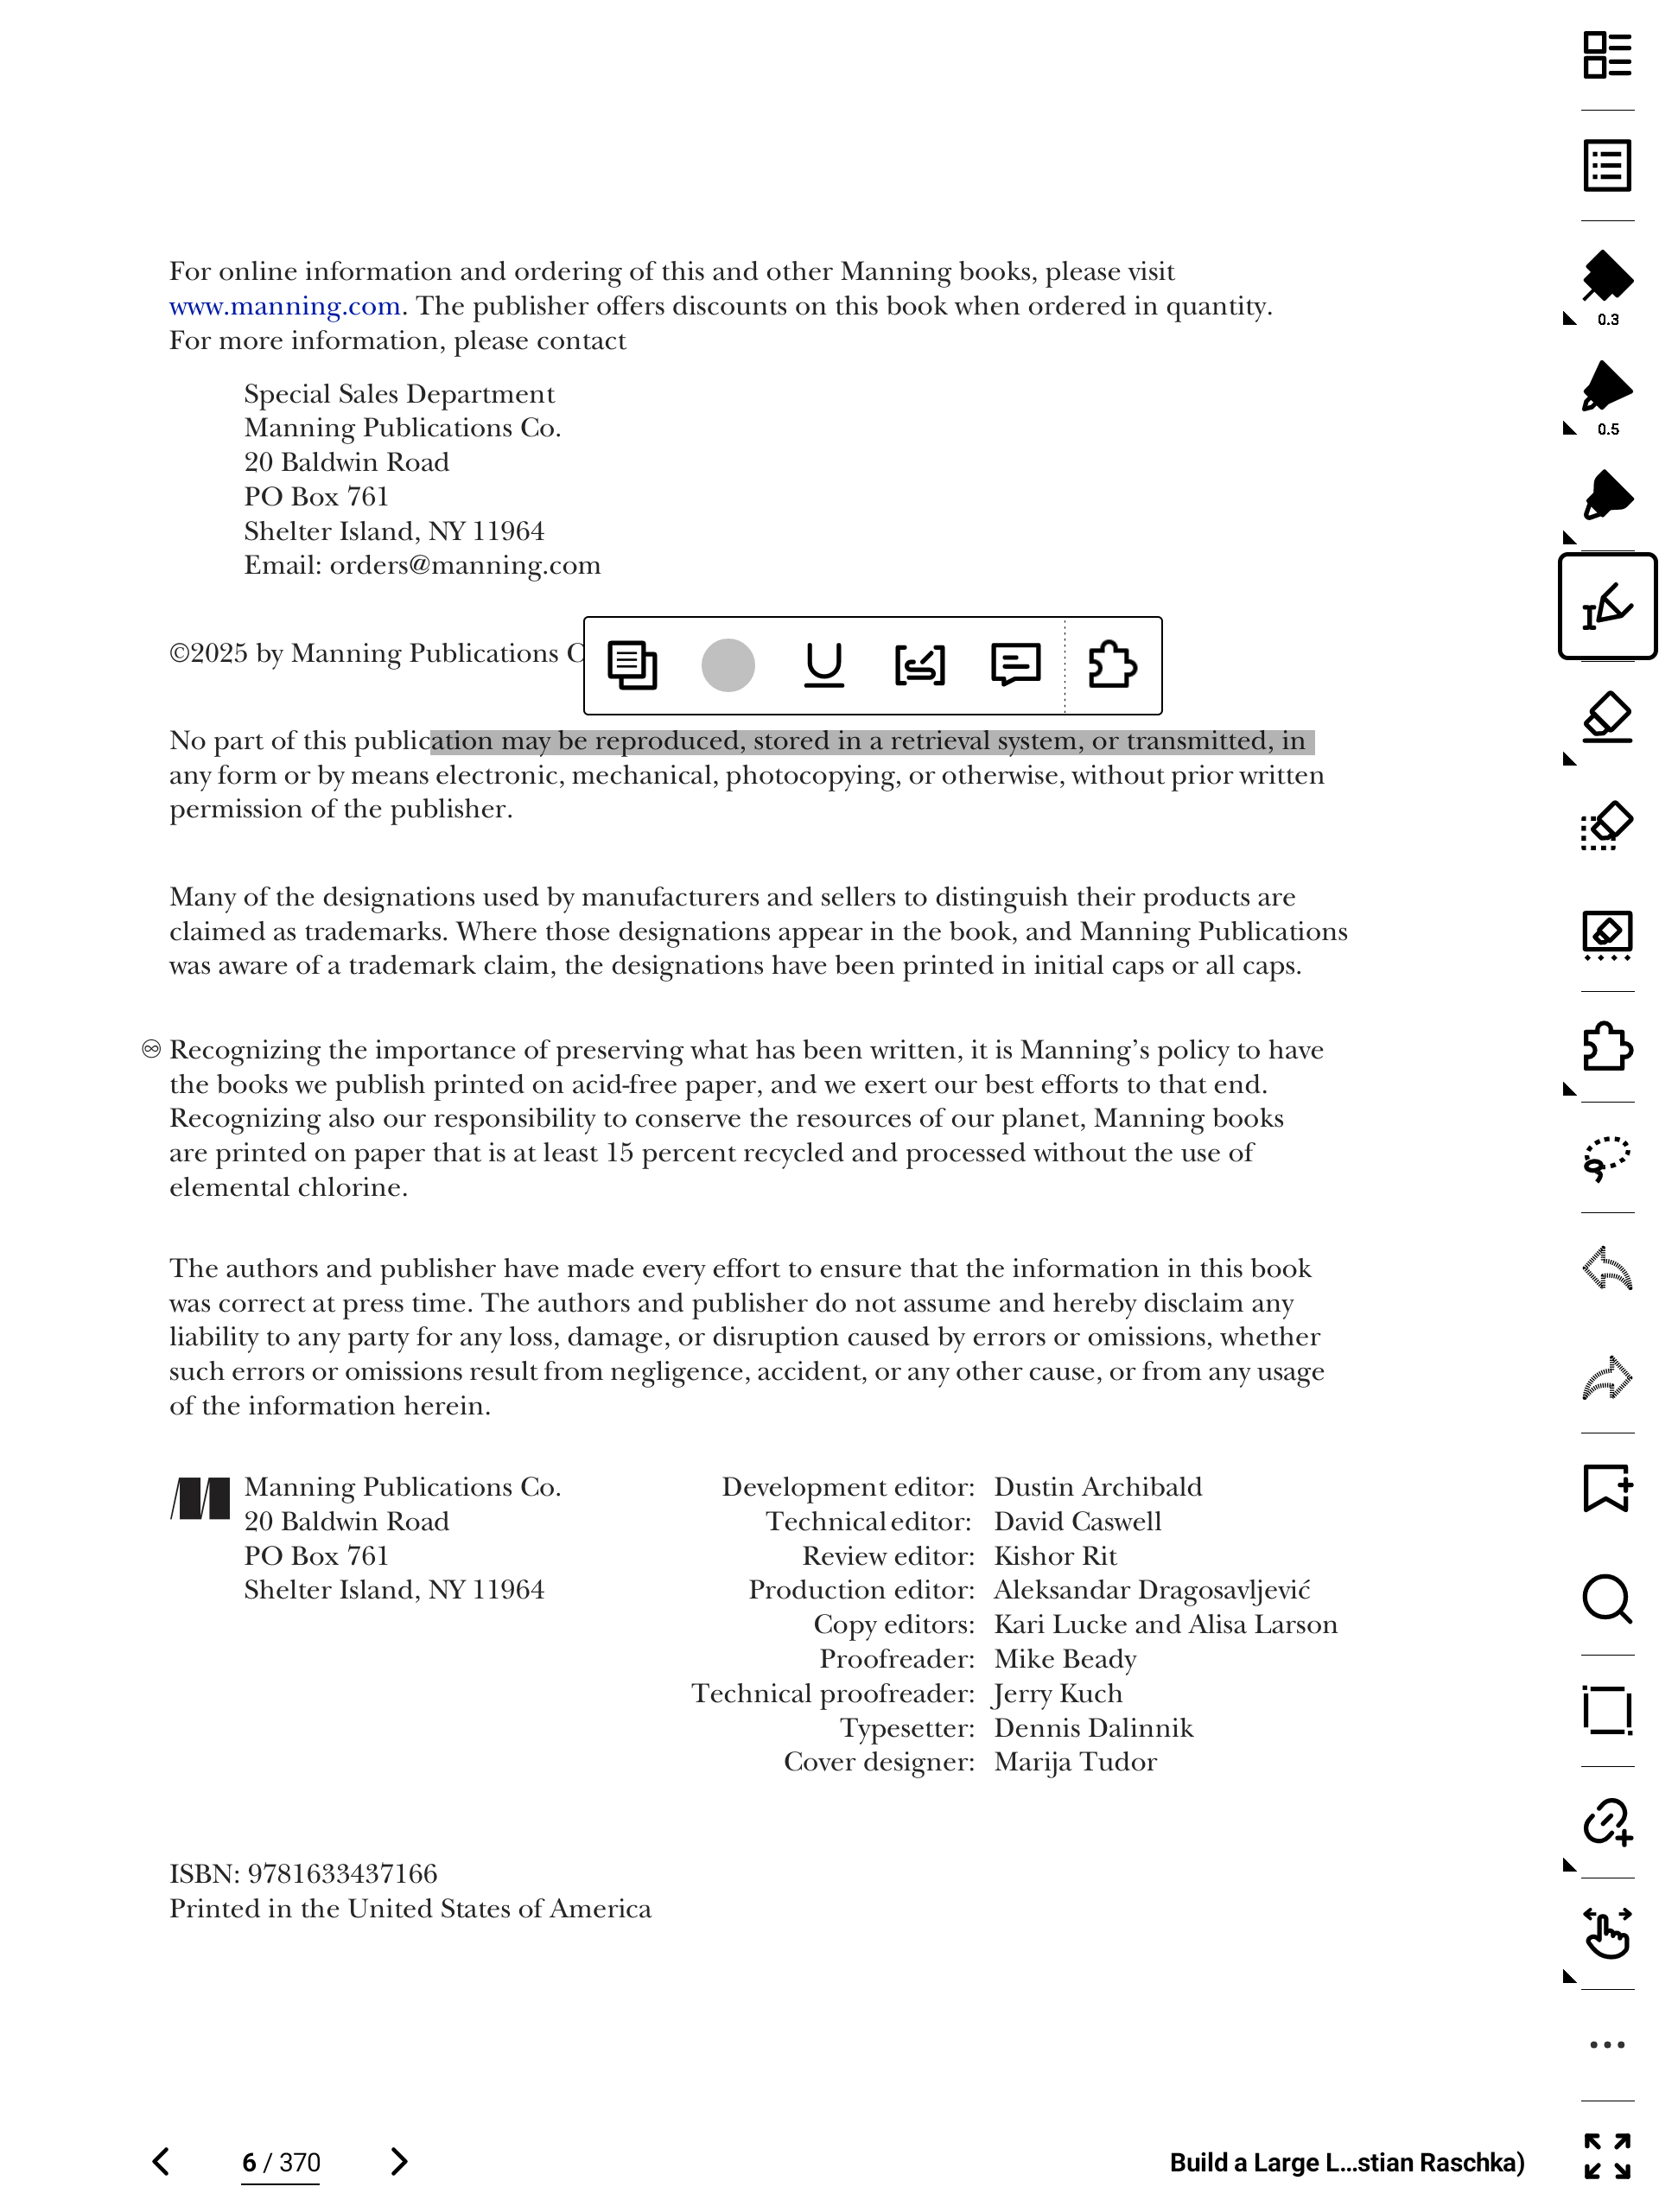
type=3,按钮就会显示在 DOC 的划词工具栏中:
插件界面编写
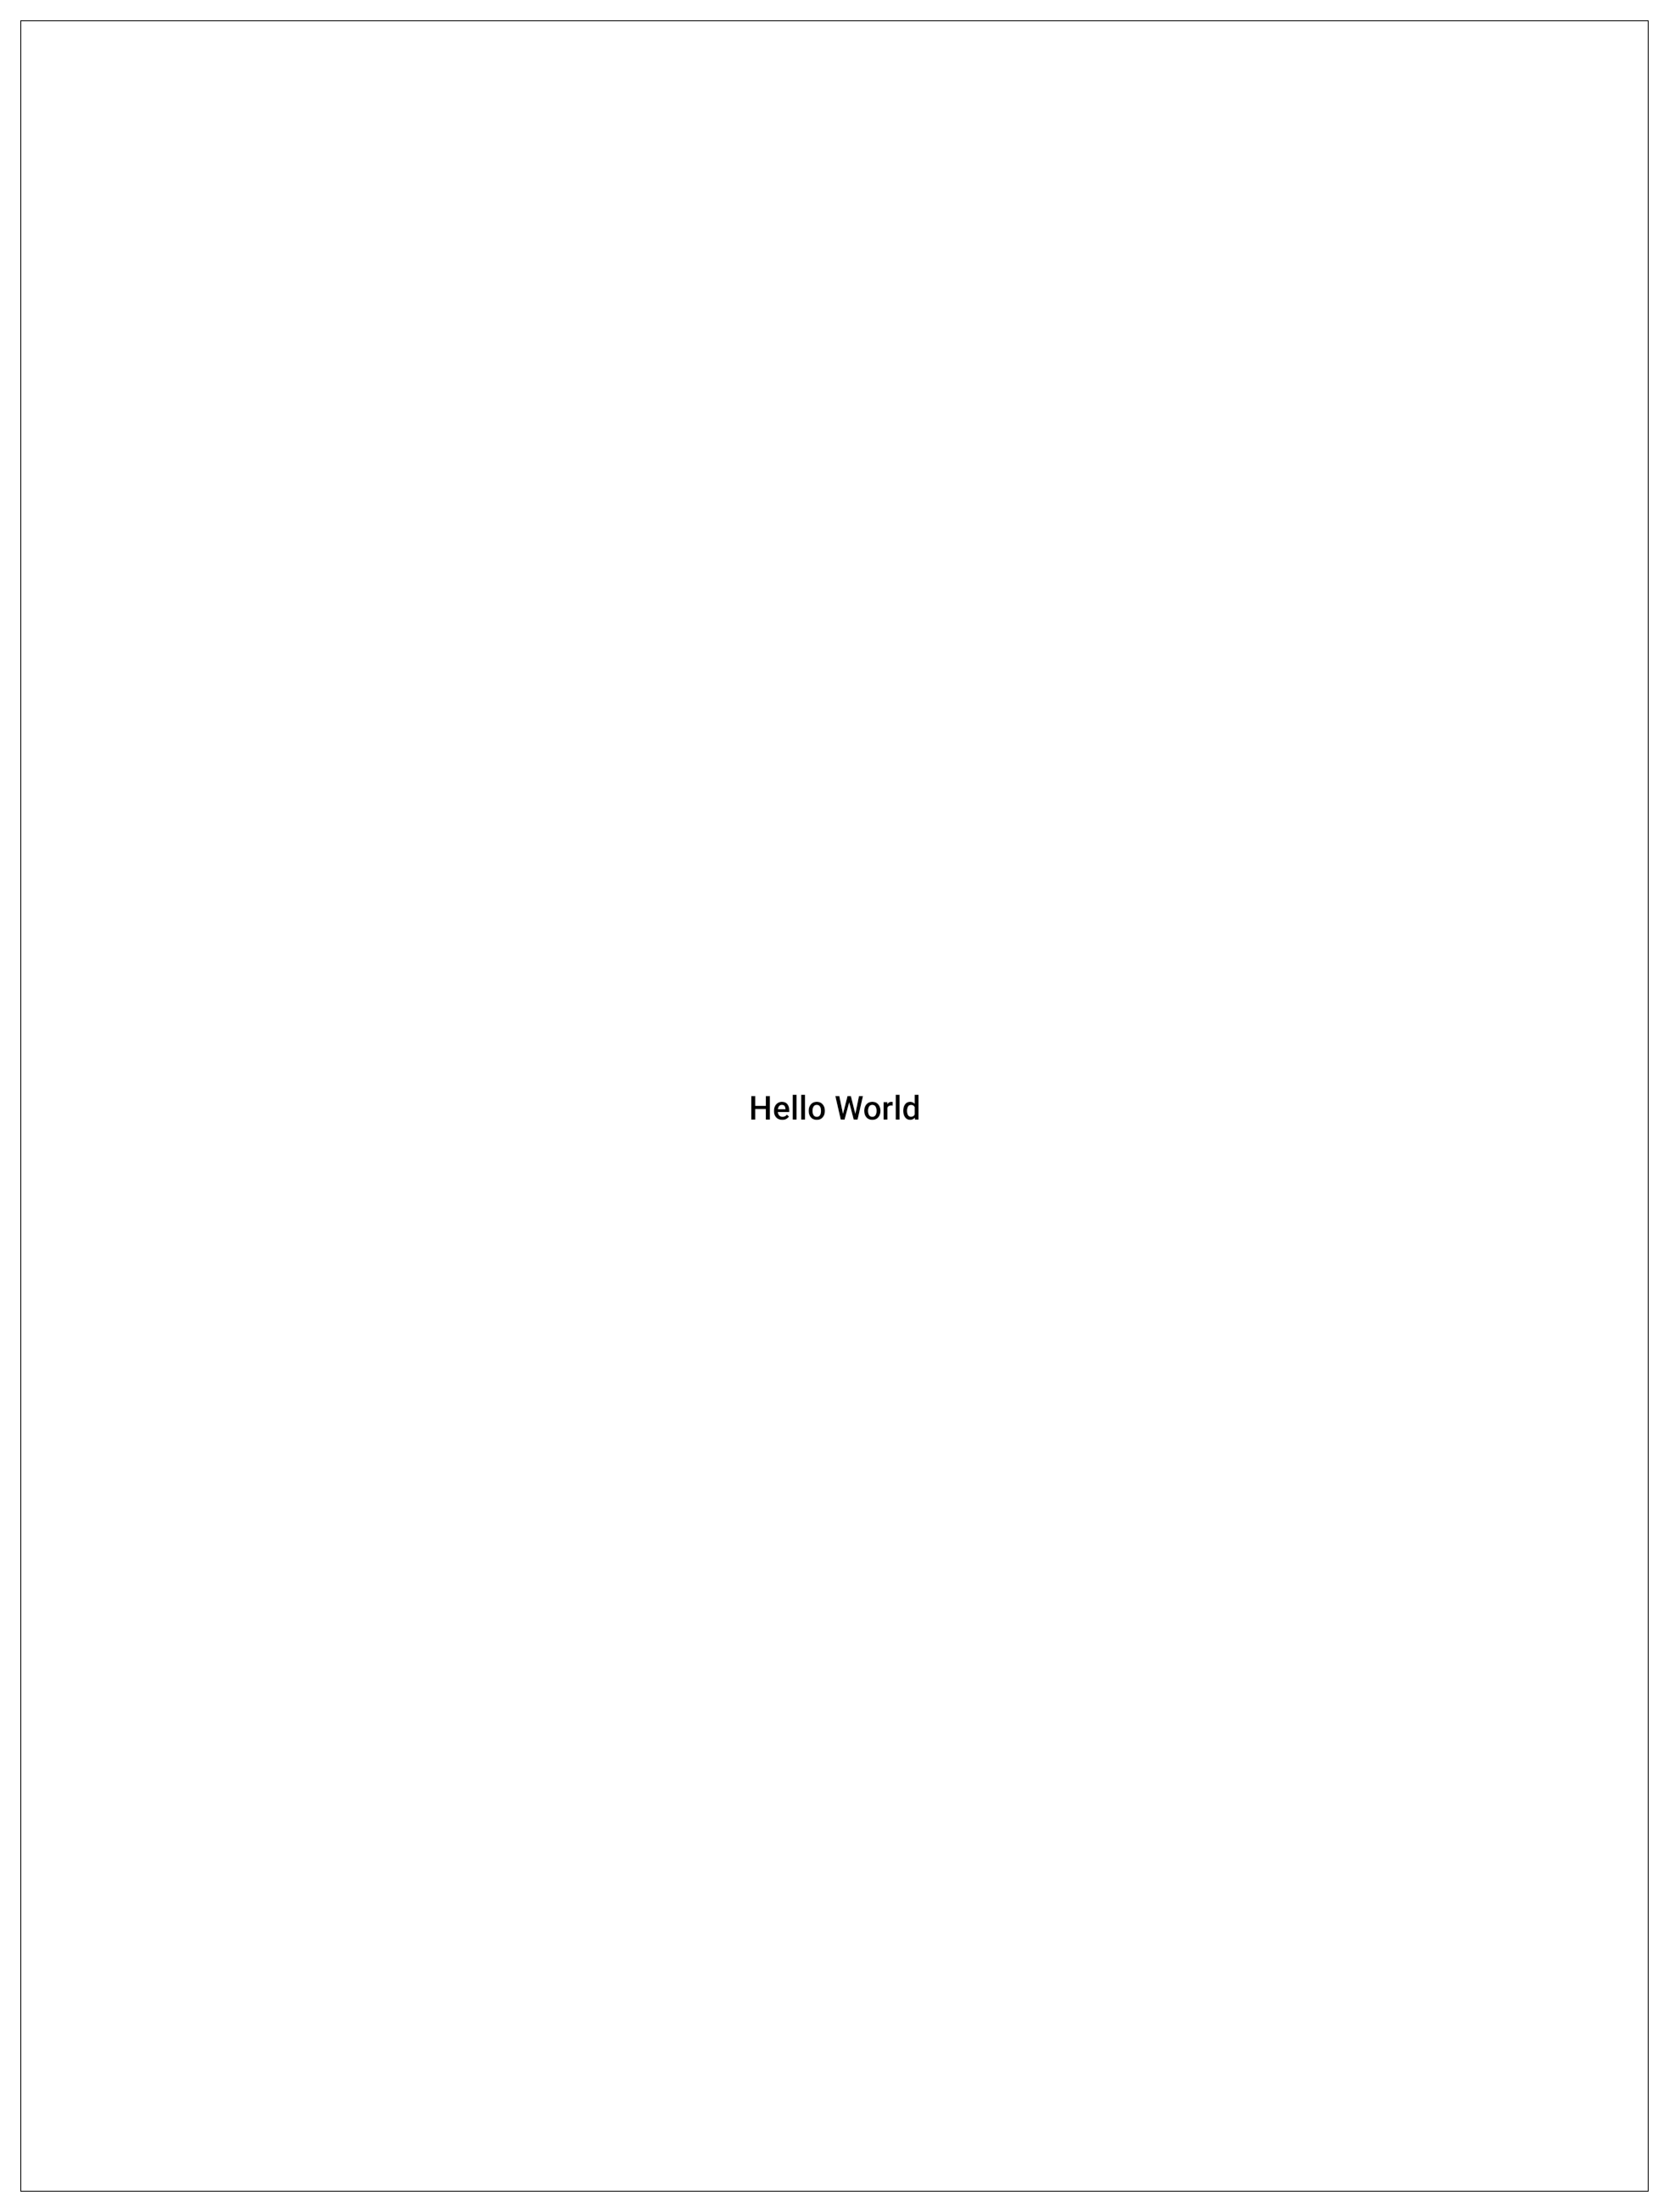
App.tsx 是插件界面的入口组件。模板默认实现为一个 “Hello World” 界面,你可以在该文件中修改 UI:
App.tsx 中按需修改界面。
当前 App.tsx 仅在屏幕中间显示 “Hello World”,界面如下:
插件打包
本节介绍如何将插件项目打包为可安装的插件包。 模板工程会包含两个打包脚本:buildPlugin.ps1(Windows)与 buildPlugin.sh(Linux/macOS)。在插件项目根目录执行对应脚本即可完成打包:
Windows 运行以下命令:
PluginConfig.json,示例内容如下:
PluginConfig.json 是插件配置文件。它只会在首次打包时生成,后续需要你手动维护。字段说明如下:
打包完成后会生成
build 目录,结构如下:
generated 目录存放的是打包过程生成的中间产物;最终安装包为 build\outputs\plugin.snplg。
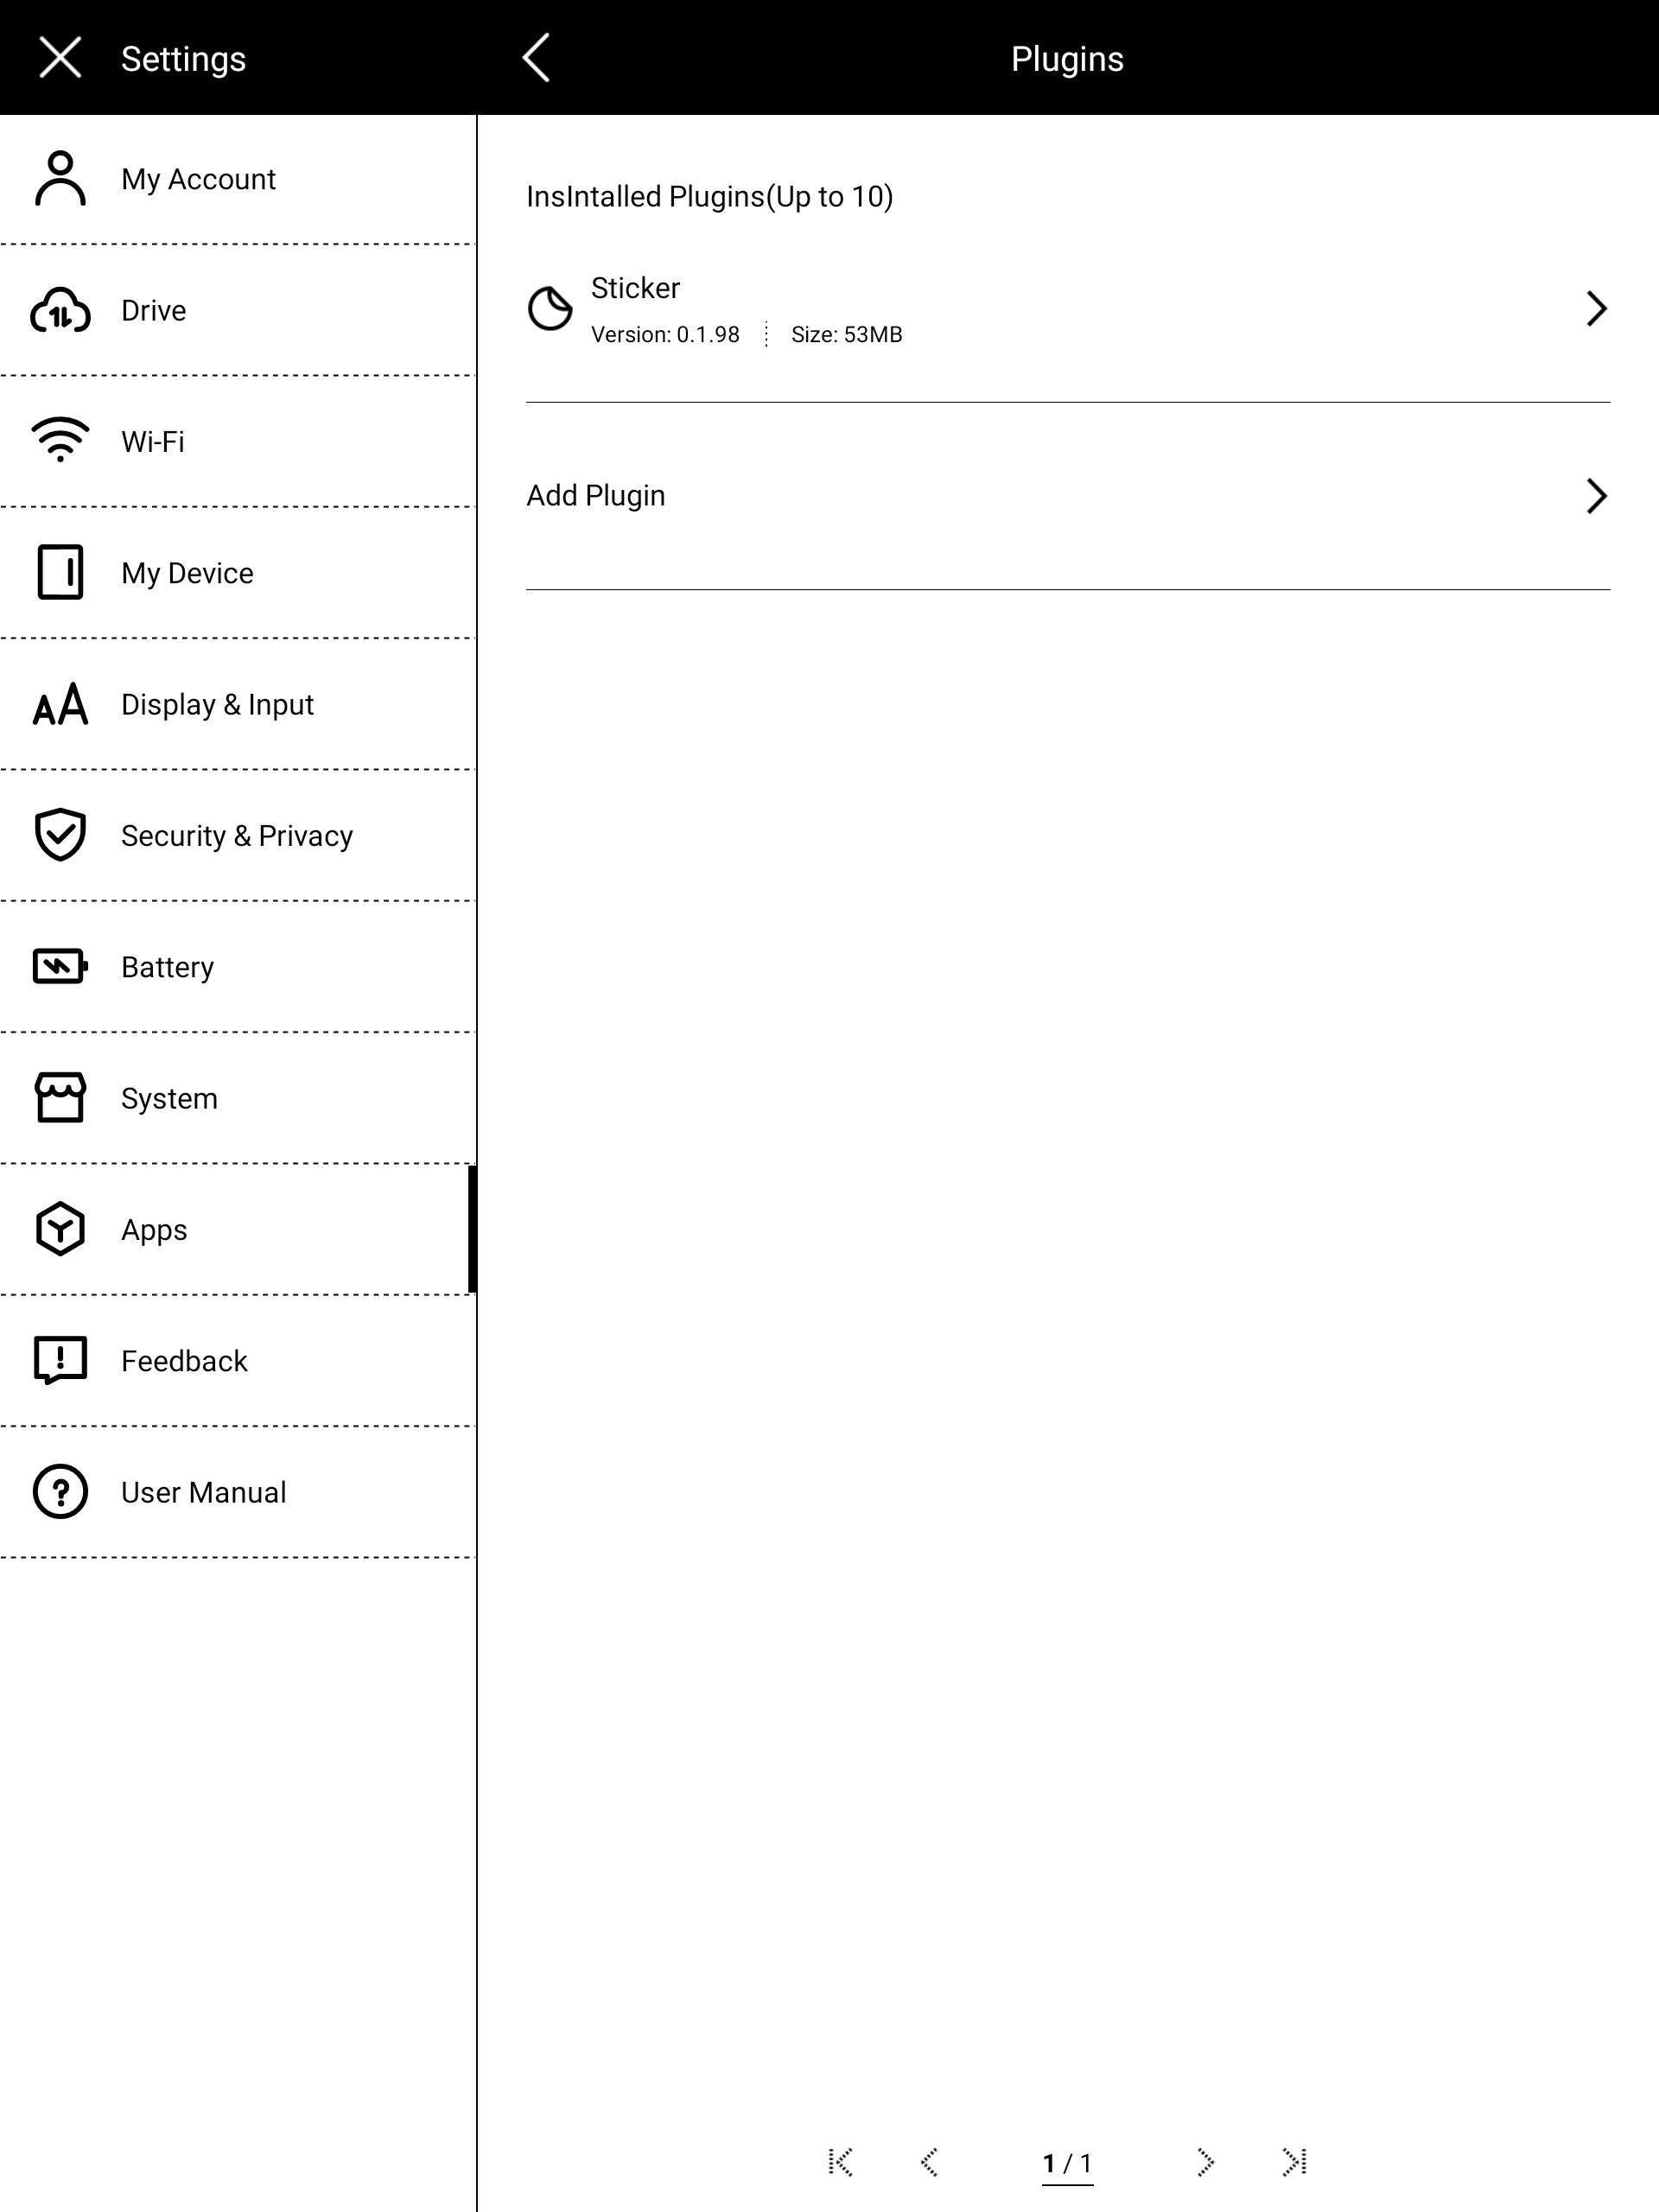
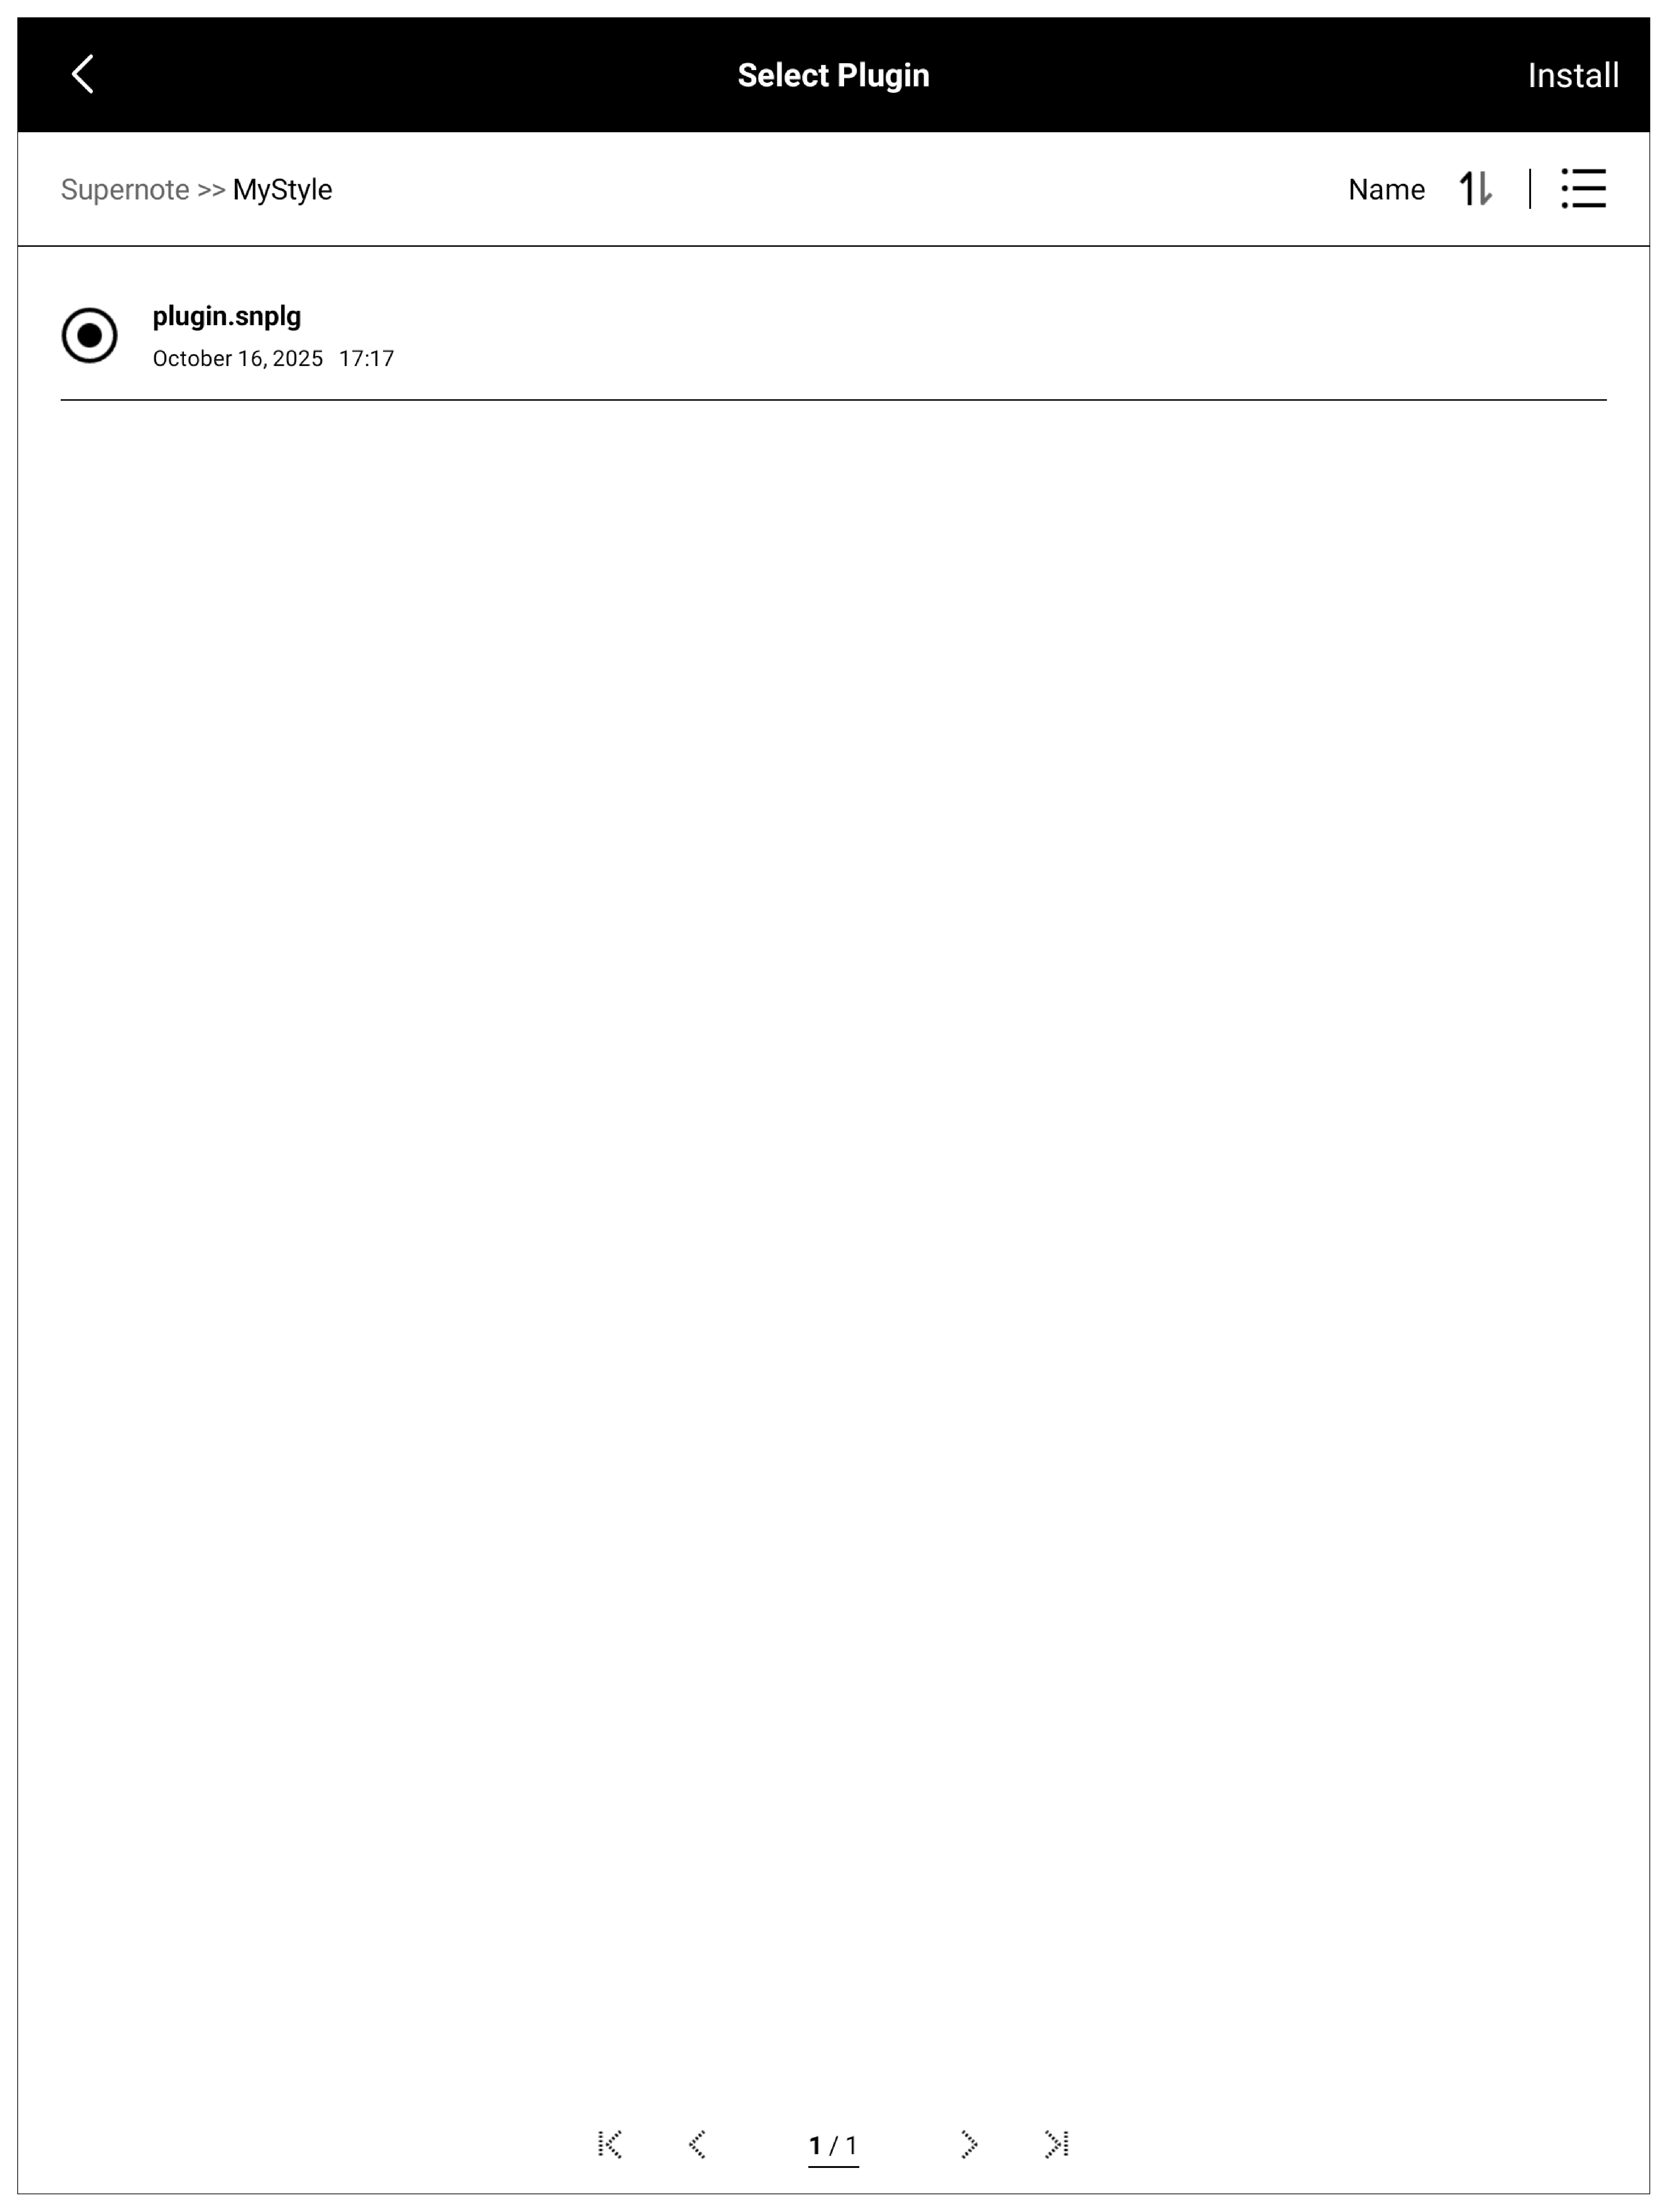
插件安装
将build\outputs\plugin.snplg 拷贝到 Supernote 设备的 MyStyle 目录下。
然后在设备上打开 “Settings -> Apps -> Plugins”: